For superb performance on the go, the Canon EOS 6D Mark II camera puts full-frame performance into a compact, fully featured DSLR. Its 26.2 Megapixel CMOS sensor and DIGIC 7 Image Processor help deliver amazing results even at expanded ISO settings, making it great for challenging low-light situations as well as landscape, portrait and event photography. With the EOS 6D Mark II's speed to capture action and the versatility to create phenomenal photographs and Full HD 60p videos in numerous environments and lighting situations, the camera offers creative content makers a winning combination of advanced features in a portable package that's as fun as it is powerful. After you have got a 1080p MOV or MP4 footage from Canon EOS 6D Mark II, you may want to edit it with Davinci Resolve then share your work with thousands audience on Youtube. However, editing procedure sometime goes beyond your expectation.
As a professional non-linear editing program, Davinci Resolve is the world's most advanced color grading tools. It can support several different resolution: SD, HD. While the file formats work with Davinci Resolve including MOV, MP4, MXF, EXR and OTHERS.. Unfortunately, from some forum, we found some users have issues importing Canon EOS 6D Mark II recordings to DaVinci Resolve. What is the best Best Canon EOS 6D Mark II MOV/MP4 footage to DaVinci Resolve Workflow? Any solution for import/edit Canon EOS 6D Mark II MOV/MP4 footage in Davinci Resolve on Window/Mac? As we all know, Canon EOS 6D Mark II could ouput video formats like below:
Movie Resolution:
1920*1080 (60p/50p/30p/25p/24p)
1280*720 (60p/50p/30p/25p)
Movie File Format:
MP4 (Video: H.264 IPB/IPB Light, Audio: AAC)
MOV ((Video: H.264 All-I, Audio: Stereo Linear PCM, FHD time-lapse only), Motion JPEG (4K time-lapse only))
From Davinci Resolve supported fromats and codec, we have list 3 options for you to solve "can't import/eidt Canon EOS 6D Mark II MOV/MP4 footage in Davinci Resolve" problem.
Option 1: When you've got a 1080p MOV video with 60 frames shot by Canon EOS 6D Mark II, and want to edit it with Davinci Resolve, the truth is that it will be very choppy when you start to edit this footage. To solve this problem, we strongly recommend you a powerful assistant - Pavtube Video Converter/For Mac, which could help you downscale 60 frames video to 30p, or 25p for smooth editing on Davinci Resolve.
Option 2: For getting H.264 MP4 footage then importing into Davinci Resolve, if you don't care about the output formats after edititng on Davinci Resolve, you can skip this. Cause Davinci Resolve could decode H.264 MP4, but can't encode H.264 MP4 on Windows and Mac. For those people who care about the output format, you can take measures as following I will show you. To be frank, MP4 is not friendly to non-linear editing program, no matter Davinci Resolve, or other editing programs. To solve the video format incompatibility issues, we highly recommend you to convert H.264 MP4 to DNxHD MOV, which could be the best video format for non-linear editing program. You must want to know how to convert H.264 MP4 to DNxHD MOV, keep reading.
Option 3: If you have got H.264 MOVwith 30 frame, luckily, this kind of footage will be perfect when you edit with Davinci Resolve.
Below we will go with Pavtube Video Converter to show you the specific steps to convert Canon EOS 6D Mark II H.264 MP4 to Davinci Resolve for Editing on Windows, and its Mac version has the same operating procedure.
How to transcode Canon EOS 6D Mark II H.264 MP4 to Davinci Resolve for Editing?
Step 1: Add Canon EOS 6D Mark II H.264 MP4 with 30 frame video files.
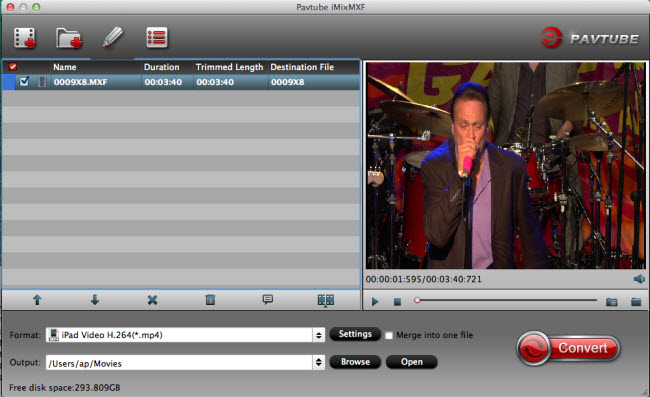
Launch this assistant on your Windows, click the “Load file” or “Add Video” icon on the main interface to import Canon EOS 6D Mark II H.264 MP4 video into the program.

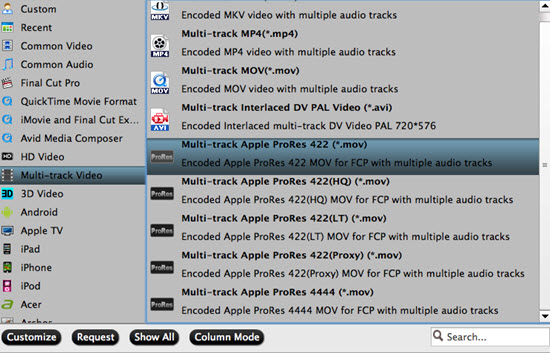
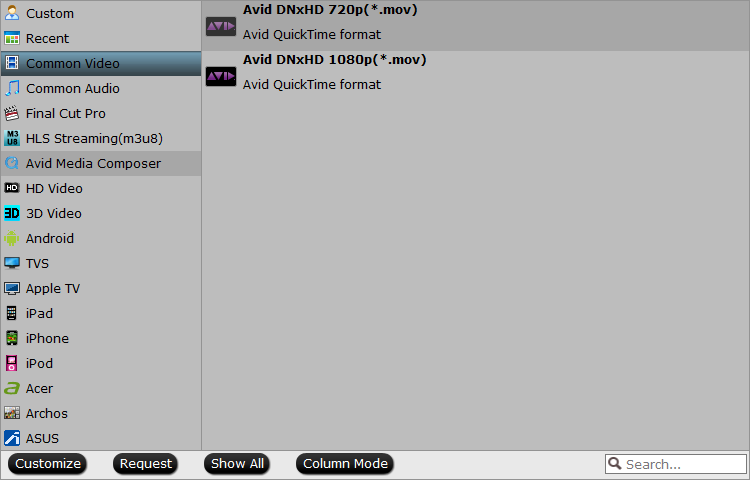
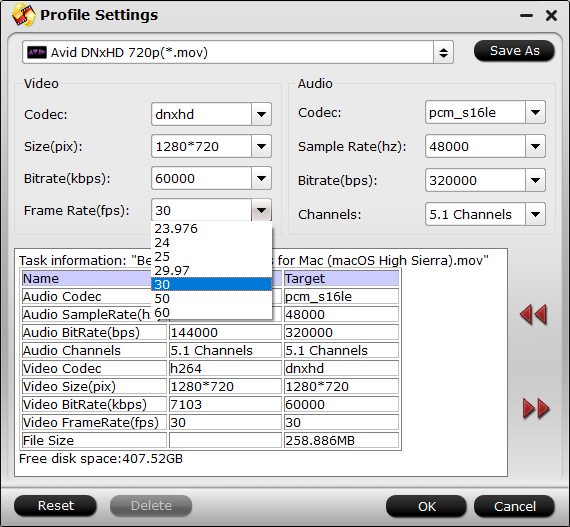
Step 2: Choose DNxHD MOV as output file format.
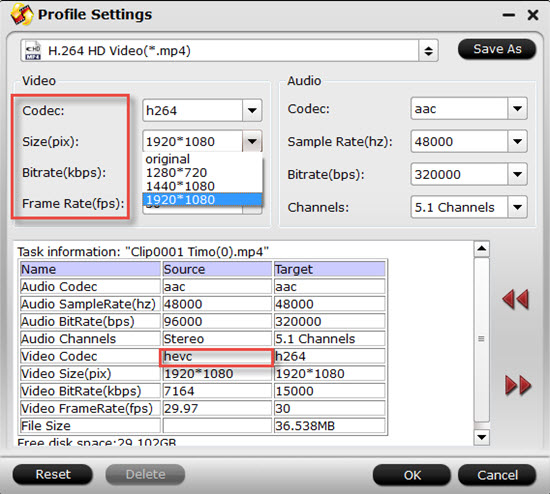
Click "Format" bar, from its drop-down option, choose "Avid DNxHD 720p/1080p(*.mov)" best editing codec by selecting "Avid Media Composer".
Step 3: Downscale 60p to 30p(Optional).
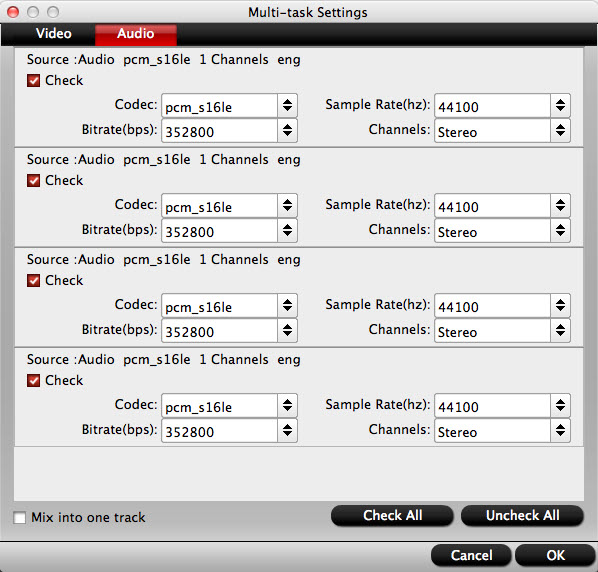
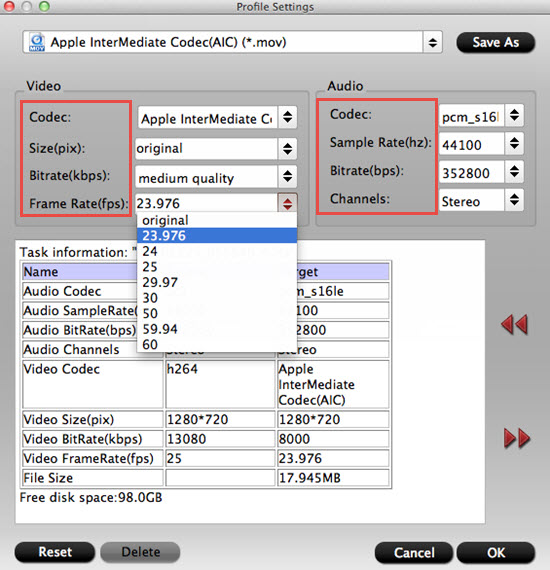
If you worry about footage with 60p which can't be played on Davinci Resolve smoothly, you can click "Settings" on the main interface, and change "Frame Rate" from 60 to 30. you also can flexibly tweak video Codec, Size, Bitrate, Frame Rate, Audio Codec, Sample Rate as you like.
Tip: Generally, the higher the bitrate is, the bigger file size it will be.
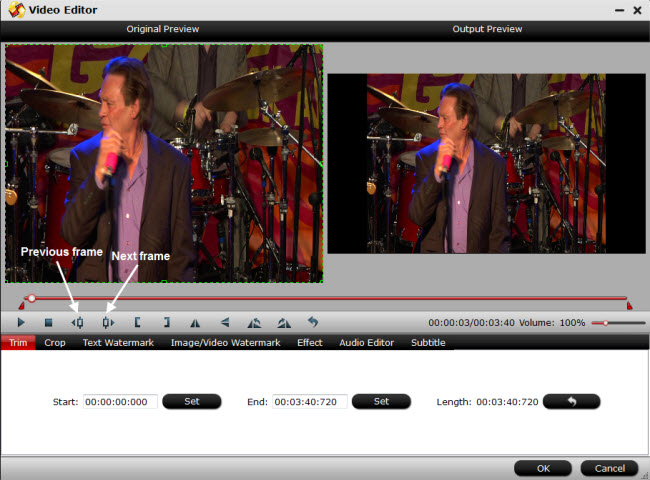
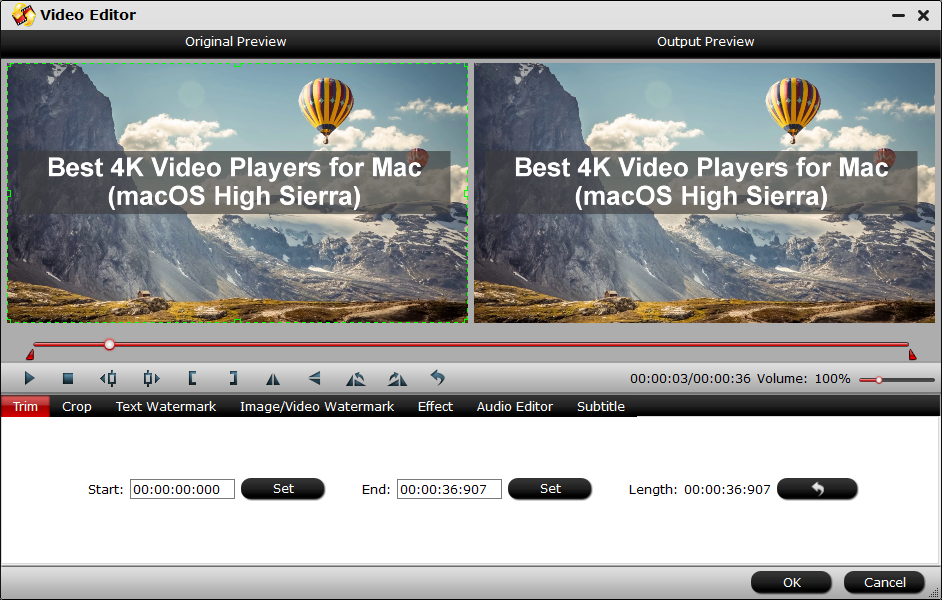
Step 4: Edit video.
This program also supplies simple edition features, please click pen icon on the main interface, and enter the "Video Editor" interface, there are seven edit tabs: Trim, Crop, Text Watermark, Image/Video Watermark, Effect, Audio Editor and Subtitle for you to select. More feature you can check this review.
Step 5: Start the conversion process.
After all the setting is over, go back to the main interface and hit right-bottom "Convert" button to start Canon EOS 6D Mark II H.264 MP4 to Avid DNxHD 720p/1080p(*.mov) conversion process.
You can click "Open" and pop up the folder with converted file, then launch Davinci Resolve on your Windows/Mac to import Canon EOS 6D Mark II H.264 MP4 video to Davinci Resolve for editing.
Knowledge about Pavtube-An easy-to use, functional video converter and video editor
- Convert almost all Canon HD/SD audio/video to 200+ audio/video formats like, MP4, MOV, MKV, AVI, WMV, etc.
- Convert Canon 4k/HD/SD footage to massive non-linear editing programs, like iMovie, Adobe Promeire Pro, After Effects,Final Cut Pro and more.
- Get footages of Canon/Sony/Panasonic series footage for free playback on popular devices like, Samsung Galaxy Note 8, iPhone, iPad, PS4 Pro, and more.
- Powerful editing functions enables you to trim or cut unwanted parts of recorings, insert subtitles, add creator's watermark, etc.
- GPU acceleration technology available.
Related Articles
- How to Solve Canon C100 AVCHD MP4 not Edited by Davinci Resolve on Mac?
- Play Canon 5D Mark IV 4K video on QuickTime smoothly
- MOV & DaVinci Resolve Solution: Transcode Unrecognized MOV to ProRes HQ for DaVinci Resolve
- Import Canon EOS C700 4K video to Avid Media Composer on Mac
- DaVinci Resolve: Import Panasonic P2 MXF to DaVinci Resolve on Mac
Hot Articles & Reviews
- How to Edit Sony AX33 XAVC S in Avid Media Composer/DaVinci Resolve?
- How to Get iMovie to Work with Canon PowerShot G5X/G9X MP4 on Mac El Capitan?
- How to Transcode Canon MXF to Apple ProRes with Multi-track on Mac?
- How to Import and Edit iPhone 6S/6S Plus 4K Video with Davinci Resolve?
- Convert Canon XA20 MP4/MTS files to Final Cut Pro X with best quality on Mac
Any Product-related questions?support@pavtube.com